🚶♂️【Jetpack】Android Navigation 創建與跳轉 (一) 範例🗺️
Android Jetpack Navigation 是一個統一的導航框架,可以讓開發者更容易地將 Android 皆常用的導航功能(如功能表、堆疊、抽屜和底部導航等)添加到應用中。
它為多個導航目的地提供一致的 API,並可以讓開發者將導航行為通用於單個或多個活動。
文章目錄
- Navigation & Safe Args 導入
- Navigation 創建 nav_graph.xml
- Navigation 引用 FragmentContainerView
- Navigation 創建 Fragment
- Navigation 添加 Fragment 到 nav_graph.xml
- Navigation 跳轉 Action 方式
- Navigation 跳轉 ID 方式
- Navigation popUpTo Action 方式
- Navigation popUpTo ID 方式
- Developer Documents Navigation
1.Navigation & Safe Args 導入
build.gradle(Module)
plugins {
    id 'androidx.navigation.safeargs.kotlin'
}

android {
    buildFeatures {
        dataBinding true
    }
}

dependencies {
    def nav_version = "2.5.3"
    implementation "androidx.navigation:navigation-fragment-ktx:nav_version"
    implementation "androidx.navigation:navigation-ui-ktx:nav_version"
}
build.gradle(Project)
buildscript {
    dependencies {
        def nav_version = "2.5.3"
        classpath "androidx.navigation:navigation-safe-args-gradle-plugin:$nav_version"
    }
}

plugins {
    id 'androidx.navigation.safeargs.kotlin' version '2.5.3' apply false
}
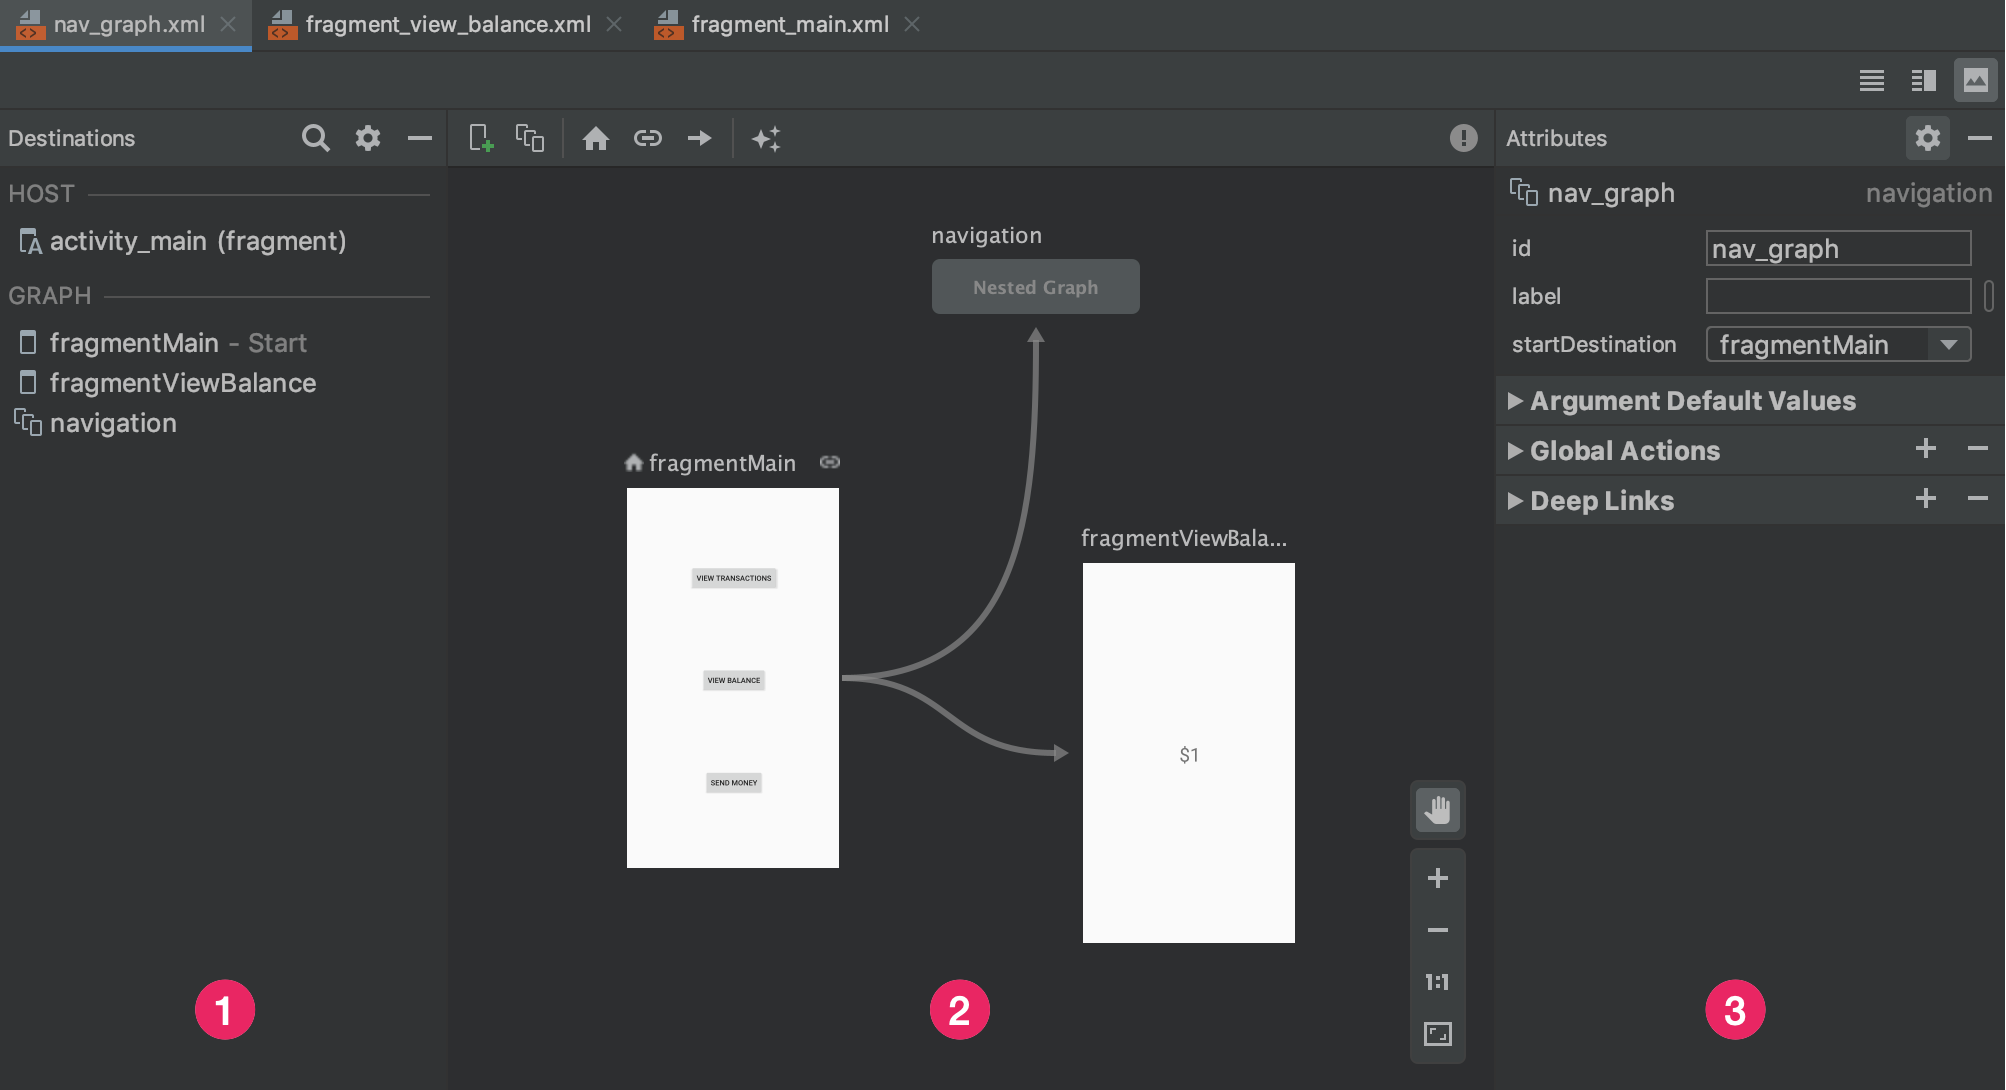
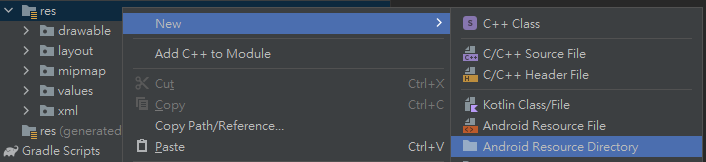
2.Navigation 創建 nav_graph.xml
選擇 Android Resource Directory
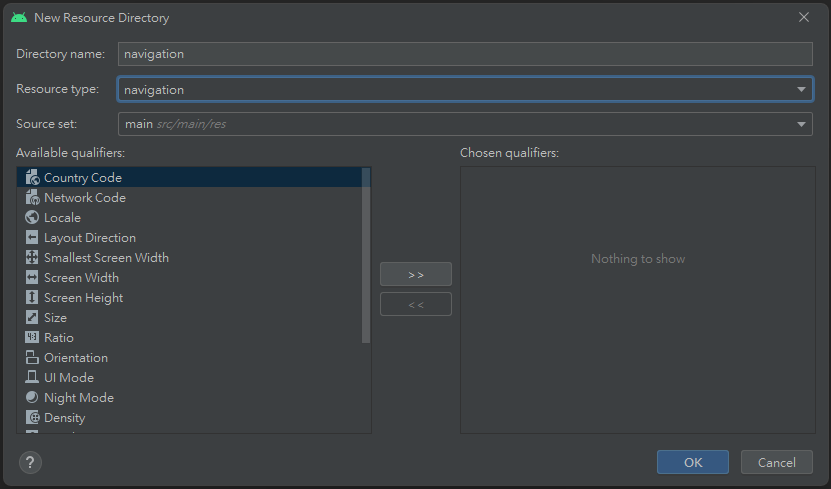
選擇 navigation
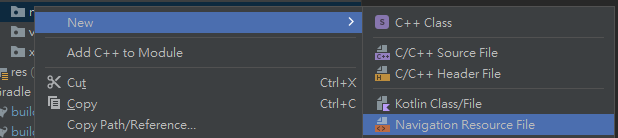
創建 Navigation Resource File
3.Navigation 引用 FragmentContainerView
activity_main.xml
<?xml version="1.0" encoding="utf-8"?>
<layout xmlns:android="http://schemas.android.com/apk/res/android"
    xmlns:app="http://schemas.android.com/apk/res-auto"
    xmlns:tools="http://schemas.android.com/tools">

    <data>

    </data>

    <androidx.constraintlayout.widget.ConstraintLayout
        android:layout_width="match_parent"
        android:layout_height="match_parent"
        tools:context=".MainActivity">

        <androidx.fragment.app.FragmentContainerView
            app:defaultNavHost="true"
            app:navGraph="@navigation/nav_graph"
            android:id="@+id/nav_host_fragment"
            android:name="androidx.navigation.fragment.NavHostFragment"
            android:layout_width="0dp"
            android:layout_height="0dp"
            app:layout_constraintBottom_toBottomOf="parent"
            app:layout_constraintEnd_toEndOf="parent"
            app:layout_constraintStart_toStartOf="parent"
            app:layout_constraintTop_toTopOf="parent" />

    </androidx.constraintlayout.widget.ConstraintLayout>
</layout>
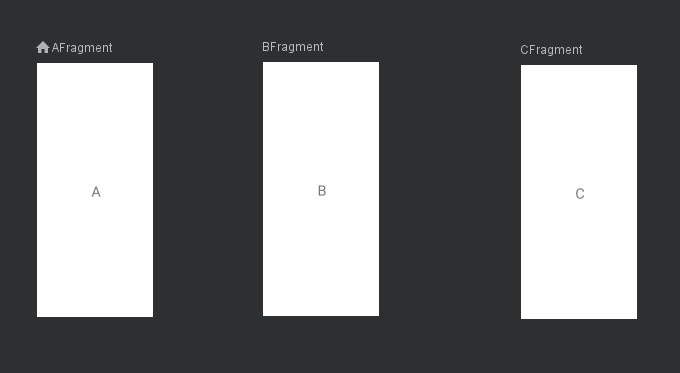
4.Navigation 創建 Fragment
AFragment.kt
class AFragment : Fragment(R.layout.fragment_a) {

    override fun onViewCreated(view: View, savedInstanceState: Bundle?) {
        val binding = FragmentABinding.bind(view)
    }

}
fragment_a.xml
<?xml version="1.0" encoding="utf-8"?>
<layout xmlns:android="http://schemas.android.com/apk/res/android"
    xmlns:app="http://schemas.android.com/apk/res-auto">

    <data>

    </data>

    <androidx.constraintlayout.widget.ConstraintLayout
        android:layout_width="match_parent"
        android:layout_height="match_parent">

        <androidx.appcompat.widget.AppCompatTextView
            android:id="@+id/next"
            android:layout_width="wrap_content"
            android:layout_height="wrap_content"
            android:text="A"
            android:textSize="50sp"
            app:layout_constraintBottom_toBottomOf="parent"
            app:layout_constraintEnd_toEndOf="parent"
            app:layout_constraintStart_toStartOf="parent"
            app:layout_constraintTop_toTopOf="parent" />

    </androidx.constraintlayout.widget.ConstraintLayout>
</layout>
BFragment.kt
class BFragment : Fragment(R.layout.fragment_b) {

    override fun onViewCreated(view: View, savedInstanceState: Bundle?) {
        val binding = FragmentBBinding.bind(view)
    }

}
fragment_b.xml
<?xml version="1.0" encoding="utf-8"?>
<layout xmlns:android="http://schemas.android.com/apk/res/android"
    xmlns:app="http://schemas.android.com/apk/res-auto">

    <data>

    </data>

    <androidx.constraintlayout.widget.ConstraintLayout
        android:layout_width="match_parent"
        android:layout_height="match_parent">

        <androidx.appcompat.widget.AppCompatTextView
            android:id="@+id/next"
            android:layout_width="wrap_content"
            android:layout_height="wrap_content"
            android:text="B"
            android:textSize="50sp"
            app:layout_constraintBottom_toBottomOf="parent"
            app:layout_constraintEnd_toEndOf="parent"
            app:layout_constraintStart_toStartOf="parent"
            app:layout_constraintTop_toTopOf="parent" />

    </androidx.constraintlayout.widget.ConstraintLayout>
</layout>
CFragment.kt
class CFragment : Fragment(R.layout.fragment_c) {

    override fun onViewCreated(view: View, savedInstanceState: Bundle?) {
        val binding = FragmentCBinding.bind(view)
    }

}
fragment_c.xml
<?xml version="1.0" encoding="utf-8"?>
<layout xmlns:android="http://schemas.android.com/apk/res/android"
    xmlns:app="http://schemas.android.com/apk/res-auto">

    <data>

    </data>

    <androidx.constraintlayout.widget.ConstraintLayout
        android:layout_width="match_parent"
        android:layout_height="match_parent">

        <androidx.appcompat.widget.AppCompatTextView
            android:id="@+id/next"
            android:layout_width="wrap_content"
            android:layout_height="wrap_content"
            android:text="C"
            android:textSize="50sp"
            app:layout_constraintBottom_toBottomOf="parent"
            app:layout_constraintEnd_toEndOf="parent"
            app:layout_constraintStart_toStartOf="parent"
            app:layout_constraintTop_toTopOf="parent" />

    </androidx.constraintlayout.widget.ConstraintLayout>
</layout>
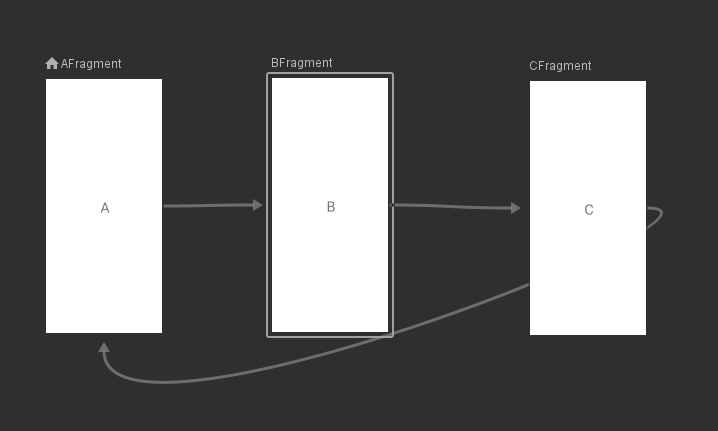
5.Navigation 添加 Fragment 到 nav_graph.xml
nav_graph.xml
<?xml version="1.0" encoding="utf-8"?>
<navigation xmlns:android="http://schemas.android.com/apk/res/android"
    xmlns:app="http://schemas.android.com/apk/res-auto"
    xmlns:tools="http://schemas.android.com/tools"
    android:id="@+id/nav_graph"
    app:startDestination="@id/AFragment">

    <fragment
        android:id="@+id/AFragment"
        android:name="com.example.jetpackdemo.AFragment"
        android:label="AFragment"
        tools:layout="@layout/fragment_a" />

    <fragment
        android:id="@+id/BFragment"
        android:name="com.example.jetpackdemo.BFragment"
        android:label="BFragment"
        tools:layout="@layout/fragment_b" />

    <fragment
        android:id="@+id/CFragment"
        android:name="com.example.jetpackdemo.CFragment"
        android:label="CFragment"
        tools:layout="@layout/fragment_c" />

</navigation>
6.Navigation 跳轉 Action 方式
nav_graph.xml
<?xml version="1.0" encoding="utf-8"?>
<navigation xmlns:android="http://schemas.android.com/apk/res/android"
    xmlns:app="http://schemas.android.com/apk/res-auto"
    xmlns:tools="http://schemas.android.com/tools"
    android:id="@+id/nav_graph"
    app:startDestination="@id/AFragment">

    <fragment
        android:id="@+id/AFragment"
        android:name="com.example.jetpackdemo.AFragment"
        android:label="AFragment"
        tools:layout="@layout/fragment_a" >
        <action
            android:id="@+id/action_AFragment_to_BFragment"
            app:destination="@id/BFragment" />
    </fragment>

    <fragment
        android:id="@+id/BFragment"
        android:name="com.example.jetpackdemo.BFragment"
        android:label="BFragment"
        tools:layout="@layout/fragment_b" >
        <action
            android:id="@+id/action_BFragment_to_CFragment"
            app:destination="@id/CFragment" />
    </fragment>

    <fragment
        android:id="@+id/CFragment"
        android:name="com.example.jetpackdemo.CFragment"
        android:label="CFragment"
        tools:layout="@layout/fragment_c" >
        <action
            android:id="@+id/action_CFragment_to_AFragment"
            app:destination="@id/AFragment" />
    </fragment>

</navigation>
AFragment.kt
class AFragment : Fragment(R.layout.fragment_a) {

    override fun onViewCreated(view: View, savedInstanceState: Bundle?) {
        val binding = FragmentABinding.bind(view)

        binding.next.setOnClickListener {
            val action = AFragmentDirections.actionAFragmentToBFragment()
            findNavController().navigate(action)
        }

    }

}
BFragment.kt
class BFragment : Fragment(R.layout.fragment_b) {

    override fun onViewCreated(view: View, savedInstanceState: Bundle?) {
        val binding = FragmentBBinding.bind(view)

        binding.next.setOnClickListener {
            val action = BFragmentDirections.actionBFragmentToCFragment()
            findNavController().navigate(action)
        }

    }

}
CFragment.kt
class CFragment : Fragment(R.layout.fragment_c) {

    override fun onViewCreated(view: View, savedInstanceState: Bundle?) {
        val binding = FragmentCBinding.bind(view)

        binding.next.setOnClickListener {
            val action = CFragmentDirections.actionCFragmentToAFragment()
            findNavController().navigate(action)
        }

    }

}
7.Navigation 跳轉 ID 方式
AFragment.kt
class AFragment : Fragment(R.layout.fragment_a) {

    override fun onViewCreated(view: View, savedInstanceState: Bundle?) {
        val binding = FragmentABinding.bind(view)

        binding.next.setOnClickListener {
            findNavController().navigate(R.id.BFragment)
        }

    }

}
BFragment.kt
class BFragment : Fragment(R.layout.fragment_b) {

    override fun onViewCreated(view: View, savedInstanceState: Bundle?) {
        val binding = FragmentBBinding.bind(view)

        binding.next.setOnClickListener {
            findNavController().navigate(R.id.CFragment)
        }

    }

}
CFragment.kt
class CFragment : Fragment(R.layout.fragment_c) {

    override fun onViewCreated(view: View, savedInstanceState: Bundle?) {
        val binding = FragmentCBinding.bind(view)

        binding.next.setOnClickListener {
            findNavController().navigate(R.id.AFragment)
        }

    }

}
8.Navigation popUpTo Action 方式
nav_graph.xml
<?xml version="1.0" encoding="utf-8"?>
<navigation xmlns:android="http://schemas.android.com/apk/res/android"
    xmlns:app="http://schemas.android.com/apk/res-auto"
    xmlns:tools="http://schemas.android.com/tools"
    android:id="@+id/nav_graph"
    app:startDestination="@id/AFragment">

    <fragment
        android:id="@+id/AFragment"
        android:name="com.example.jetpackdemo.AFragment"
        android:label="AFragment"
        tools:layout="@layout/fragment_a" >
        <action
            android:id="@+id/action_AFragment_to_BFragment"
            app:destination="@id/BFragment" />
    </fragment>

    <fragment
        android:id="@+id/BFragment"
        android:name="com.example.jetpackdemo.BFragment"
        android:label="BFragment"
        tools:layout="@layout/fragment_b" >
        <action
            android:id="@+id/action_BFragment_to_CFragment"
            app:destination="@id/CFragment" />
    </fragment>

    <fragment
        android:id="@+id/CFragment"
        android:name="com.example.jetpackdemo.CFragment"
        android:label="CFragment"
        tools:layout="@layout/fragment_c" >
        <action
            android:id="@+id/action_CFragment_to_AFragment"
            app:destination="@id/AFragment"
            app:popUpTo="@+id/AFragment"
            app:popUpToInclusive="true"/>
    </fragment>

</navigation>
CFragment.kt
class CFragment : Fragment(R.layout.fragment_c) {

    override fun onViewCreated(view: View, savedInstanceState: Bundle?) {
        val binding = FragmentCBinding.bind(view)

        binding.next.setOnClickListener {
            val action = CFragmentDirections.actionCFragmentToAFragment()
            findNavController().navigate(action)
        }

    }

}
9.Navigation popUpTo ID 方式
CFragment.kt
class CFragment : Fragment(R.layout.fragment_c) {

    override fun onViewCreated(view: View, savedInstanceState: Bundle?) {
        val binding = FragmentCBinding.bind(view)

        binding.next.setOnClickListener {
            findNavController().popBackStack(R.id.AFragment, true)
        }

    }

}
10.Developer Documents Navigation
Open in Documents Navigation