“`html
Swift 2025 教學:如何客製化 UITableView Cell
為什麼要客製化 UITableView Cell
在開發 iOS 應用時,當美術設計提供的版型無法使用 UITableView 的內建 cell 來呈現時,您就需要客製化 UITableView Cell。客製化的方式可以是透過程式碼或使用 Xib 文件進行設計。本篇文章將專注於如何使用 Xib 文件來進行 UITableView Cell 的客製化。
簡要概述
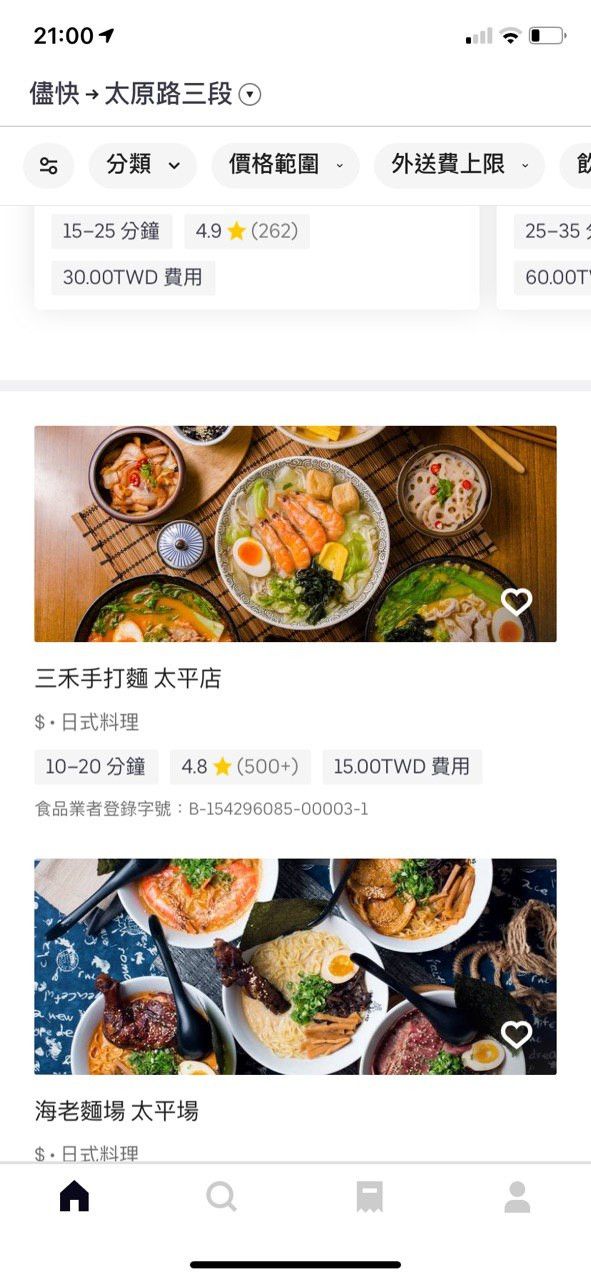
這篇教學將會帶您從最基本的客製化 cell 開始,最終達成一個包含多種元素的 UITableView。以下是我們將會實作的範例:

在這個範例中,我們將在不同的 index row 中填充 banner、collectionView 以及普通的客製化 UITableView Cell。
1. 新增 UITableView 客製化 Cell
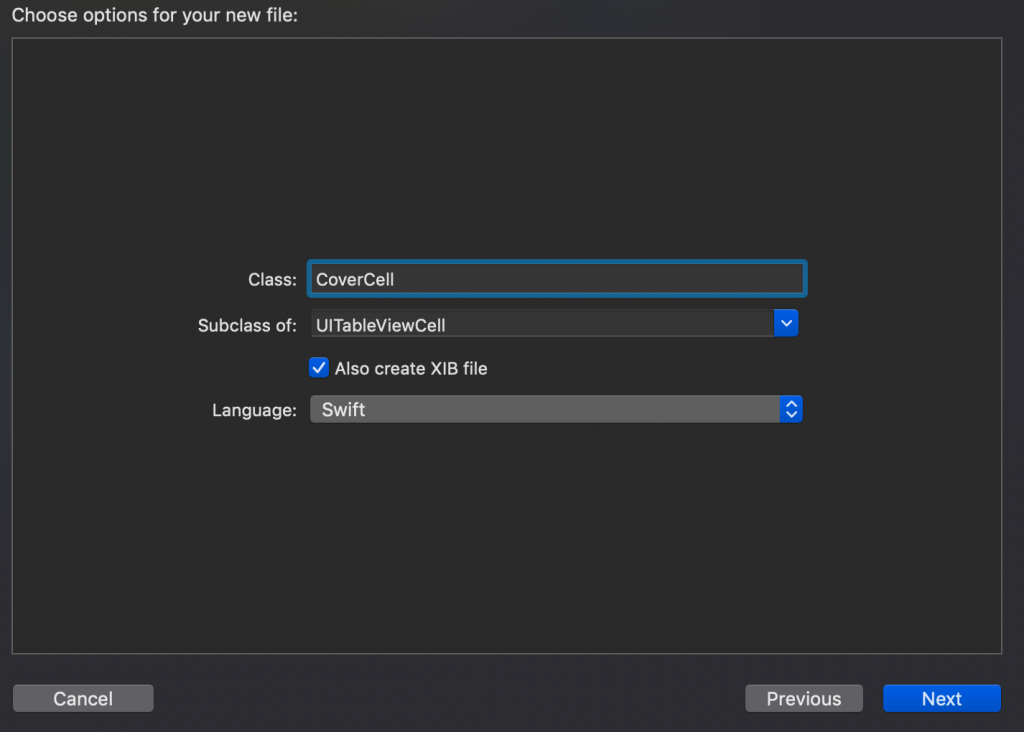
首先,您需要新增一個 Swift + Xib 文件,選擇 UITableView Cell 作為類型。

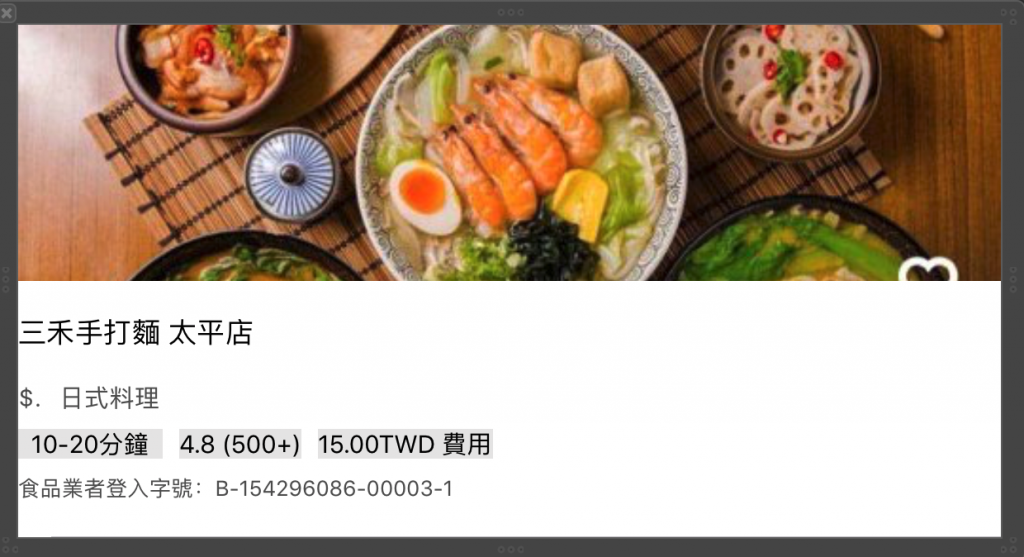
在這裡,我們的設計將會包含一個封面圖片,圖片的高度約為 cell 高度的一半,其餘的文字將平均分配至下半部。
2. 設計 Cell 的 UI
在 Xib 文件中,設置您的 UI 元素,包括圖片和文本標籤,並確保它們的約束(Constraints)正確配置,以便在不同的螢幕上顯示良好。

3. 新增 UITableView
在您的 ViewController 中,使用以下程式碼來初始化和配置 UITableView:
“`swift
override func initIMUI() {
super.initIMUI()
self.view.backgroundColor = UIColor.white
self.view.addSubview(self.collectionView)
self.view.addSubview(self.tableView)
}
“`
設定 tableView 的位置,確保它緊貼在 collectionView 下方。計算 y 值時,您需要考慮到 collectionView 的最大 y 值和 tabBar 的高度:
“`swift
lazy var tableView: UITableView = {
let tableView = UITableView()
tableView.frame = CGRect(x: 20, y: collectionView.frame.maxY, width: KScreenWidth – 20 * 2, height: KScreenHeight – collectionView.frame.maxY – kTabBarHeight)
tableView.delegate = self
tableView.dataSource = self
tableView.register(UINib(nibName: “CoverCell”, bundle: nil), forCellReuseIdentifier: “myCell”)
return tableView
}()
“`
4. 註冊客製化 Cell
確保您的 ViewController 繼承 UITableViewDelegate 和 UITableViewDataSource,並實作必要的函數:
“`swift
class HomeViewController: JGBaseViewController, UICollectionViewDataSource, UICollectionViewDelegate, UITableViewDelegate, UITableViewDataSource {
// …
}
“`
5. 實作 UITableView Data Source 方法
以下是必須實作的 Data Source 方法:
“`swift
// MARK: – UITableViewDataSource
func tableView(_ tableView: UITableView, numberOfRowsInSection section: Int) -> Int {
return 10 // 返回行數
}
func tableView(_ tableView: UITableView, heightForRowAt indexPath: IndexPath) -> CGFloat {
return 300 // 每一行的高度
}
func tableView(_ tableView: UITableView, cellForRowAt indexPath: IndexPath) -> UITableViewCell {
let cell = tableView.dequeueReusableCell(withIdentifier: “myCell”, for: indexPath) as! CoverCell
// 在這裡配置 cell
return cell
}
“`
這樣,您的客製化 cell 就基本完成了,接下來您可以進一步調整 UI 以達到理想效果。

結論
透過以上步驟,您已經學會如何客製化 UITableView Cell。這不僅能提升您應用的外觀,還能增加使用者體驗。別忘了持續優化您的設計,讓它更符合使用者需求。
Q&A(常見問題解答)
Q1: 為什麼要使用 Xib 文件來客製化 UITableView Cell?
A: 使用 Xib 文件可以讓您更直觀地設計 UI,並且可以重複使用相同的 cell 設計,減少程式碼重複。
Q2: 如何解決 UITableView Cell 顯示不正確的問題?
A: 確保您的約束設定正確,並檢查 cell 的重用標識符是否正確設定。
Q3: 如何提高 UITableView 的性能?
A: 使用預先計算的 cell 高度,實作懶加載技術,並確保避免不必要的重繪操作。
“`
—
