“`html
Swift Apple 登入全攻略:2025 最新三步驟教學與實作範例 Sign in with Apple
簡介
Sign In with Apple 在 2019 的 WWDC 發布,近幾年的第三方登入在 Swift 開發中可說是必學技能。若您的應用程式中使用了第三方登入,根據 Apple 的 Guideline 4.8,必須提供 Sign in with Apple 作為等效選項,否則將會被拒絕上架。今天,我們將深入探討如何在您的 Swift 應用中實現 Apple 登入。
Guideline 4.8 – Design – Sign in with Apple
簡而言之,若應用使用了其他登入方式,則必須提供 Apple 登入選項。這是 Apple 的規範,確保用戶的隱私和安全。
一、 Apple 登入基本設定
1. 在 Apple Developer 添加 Sign in with Apple 權限
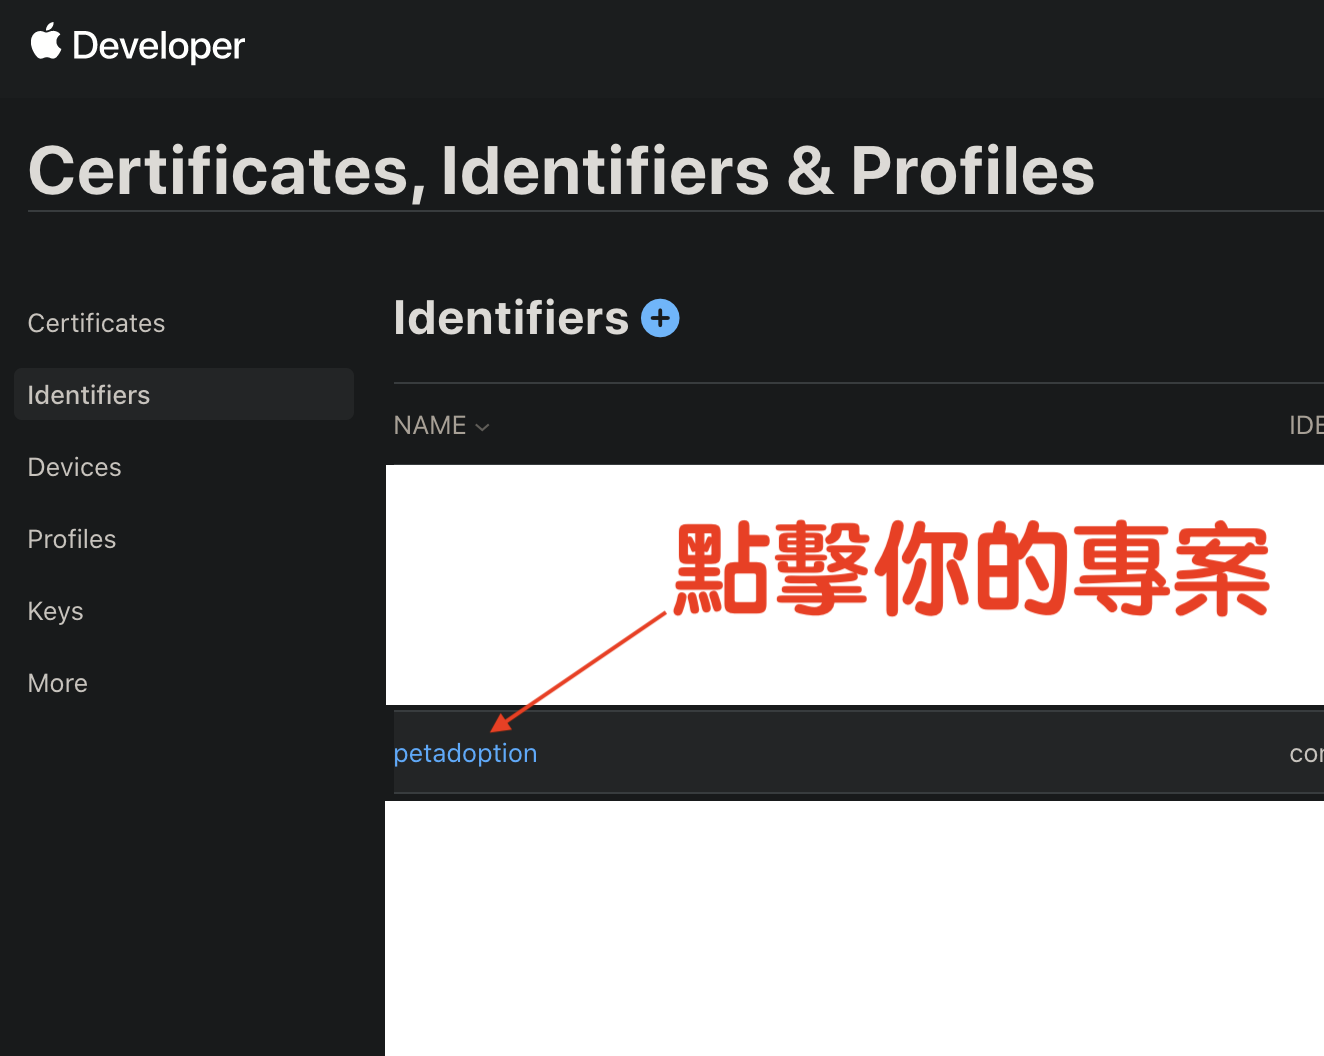
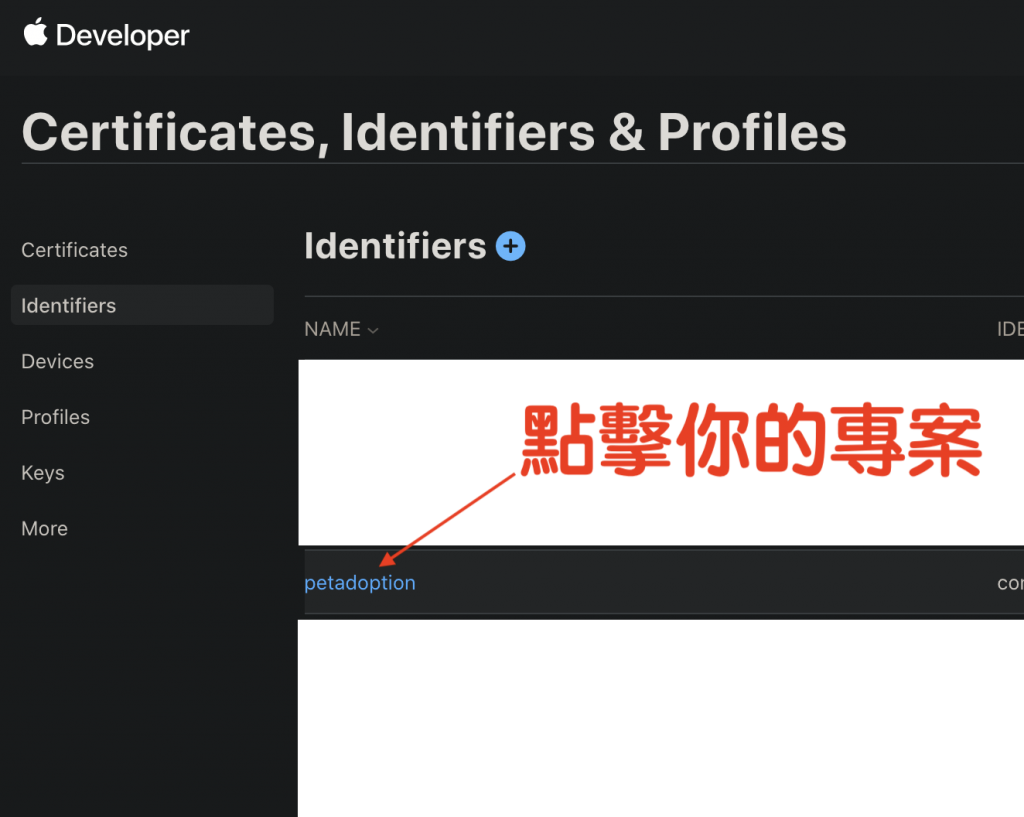
前往 Apple Developer 並點擊您的專案。
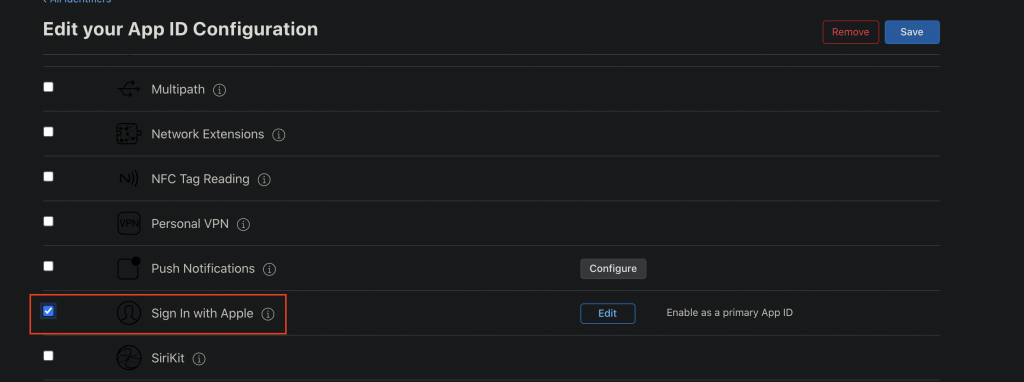
接著,將 Sign in with Apple 功能開啟。
2. 在 Xcode 添加 Sign in with Apple 權限
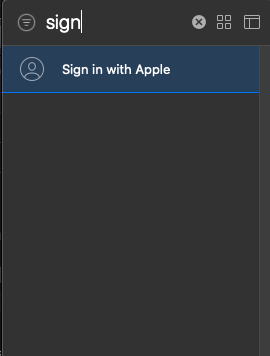
在 Xcode 中,前往 Info 標籤並點擊 Capability。
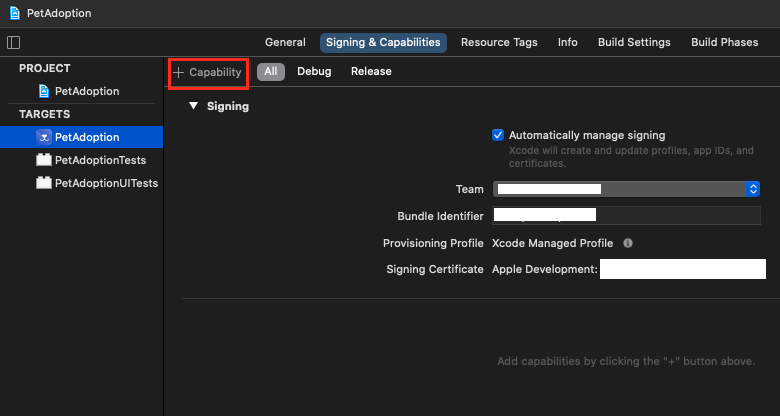
搜尋並新增 Sign in with Apple。
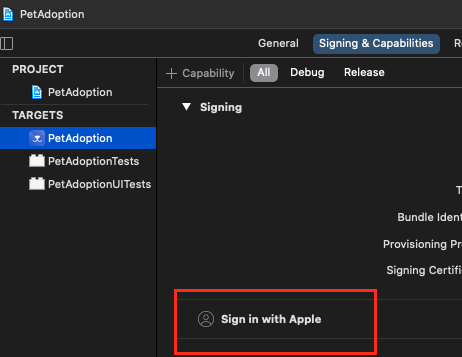
完成後,您會看到相應的權限顯示。
二、 Apple 登入程式碼範例
1. 匯入 AuthenticationServices
import AuthenticationServices2. 新增 Apple 登入原生按鈕
let button = ASAuthorizationAppleIDButton(authorizationButtonType: .default, authorizationButtonStyle: .black)
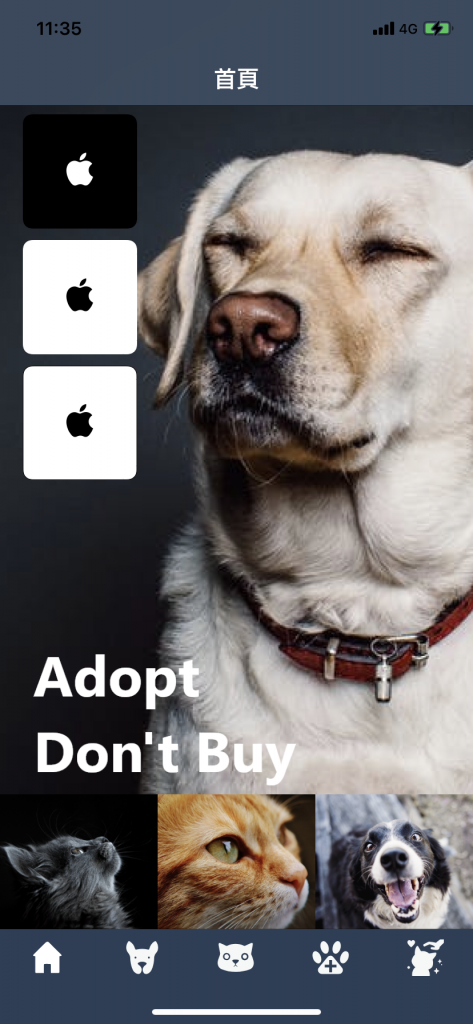
button.frame = CGRect(x: 20, y: 100, width: 100, height: 50) // 調整高度以符合設計
button.cornerRadius = 8.0
button.addTarget(self, action: #selector(appleLoginButtonTapped), for: .touchUpInside)
self.view.addSubview(button)
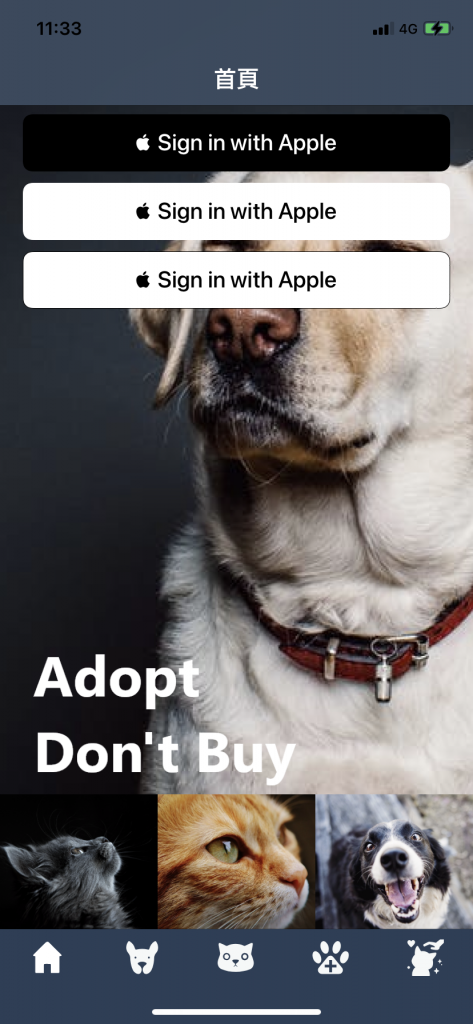
3. 設置 Apple 登入樣式
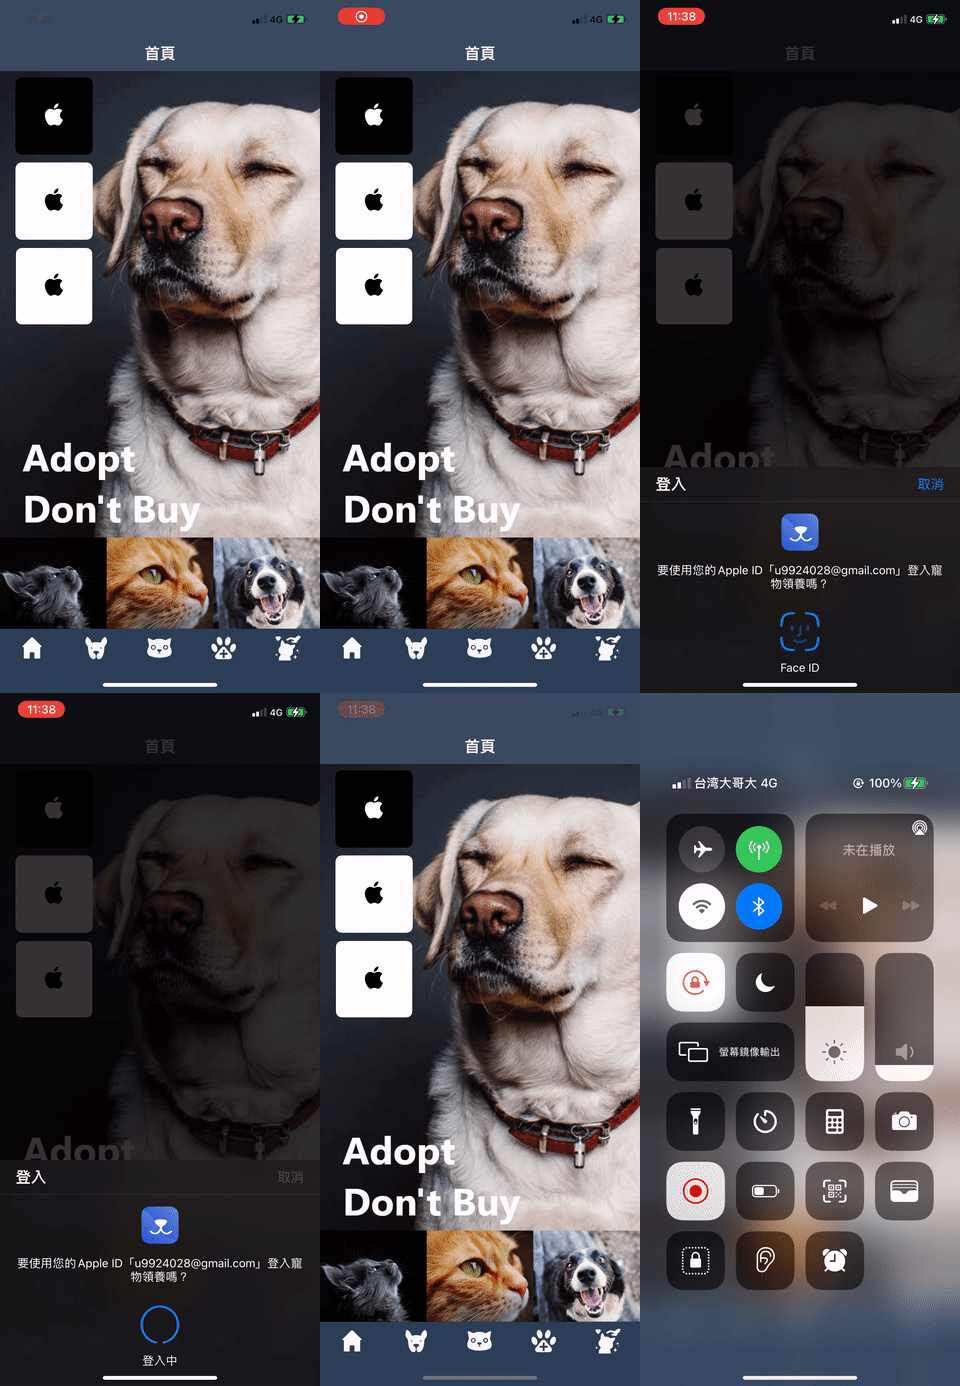
- black : 黑色
- white : 無邊框白色
- whiteOutline : 有邊框白色
4. 新增 Apple 登入事件
@objc func appleLoginButtonTapped() {
    if #available(iOS 13.0, *) {
        let provider = ASAuthorizationAppleIDProvider()
        let request = provider.createRequest()
        request.requestedScopes = [.email, .fullName]
        let controller = ASAuthorizationController(authorizationRequests: [request])
        controller.delegate = self
        controller.presentationContextProvider = self
        controller.performRequests()
    }
}
5. 監聽 Apple 登入 Delegate
extension HomeViewController: ASAuthorizationControllerDelegate {
    @available(iOS 13.0, *)
    func authorizationController(controller: ASAuthorizationController, didCompleteWithAuthorization authorization: ASAuthorization) {
        guard let credential = authorization.credential as? ASAuthorizationAppleIDCredential else {
            return
        }
        // 上傳憑證至 API
    }
    @available(iOS 13.0, *)
    func authorizationController(controller: ASAuthorizationController, didCompleteWithError error: Error) {
        // 顯示錯誤訊息
    }
}

extension HomeViewController: ASAuthorizationControllerPresentationContextProviding {
    @available(iOS 13.0, *)
    func presentationAnchor(for controller: ASAuthorizationController) -> ASPresentationAnchor {
        return self.view.window!
    }
}
三、 最後執行 DEMO
總結
透過上述步驟,您將能夠在 Swift 應用中成功整合 Sign in with Apple 功能。這不僅符合 Apple 的規範,也為用戶提供了方便與安全的登入選項。
Q&A(常見問題解答)
1. Sign in with Apple 有哪些優勢?
Sign in with Apple 讓用戶能以簡單且安全的方式登入應用,並保護其個人資訊。
2. 如何處理 Apple 登入失敗的情況?
您可以在代理方法中捕捉錯誤,並顯示適當的錯誤訊息給用戶,建議用戶重試或使用其他登入方式。
3. 是否可以在其他平台上使用 Sign in with Apple?
是的,Sign in with Apple 也可以在 Web 應用和其他平台中使用,只需遵循相應的整合步驟。
“`
—
